With a Phillips-head screwdriver, take out all four screws from the facemask clips and remove the facemask. Using the same screwdriver, remove the two screws and T-nuts from the pre-installed eyeshield mounting brackets.
2ATTACH THE FACEMASK CLIPS
On your new facemask, push clips into position with the X logo facing out on each clip. Adjust so each clip lines up with a T-nut, sticking out slightly on the front and side of the helmet.
3LINE-UP YOUR NEW FACEMASK
Place the front clips into position over the T-nuts, with a finger holding the T-nuts in place from behind. Then, align the side clips into position.
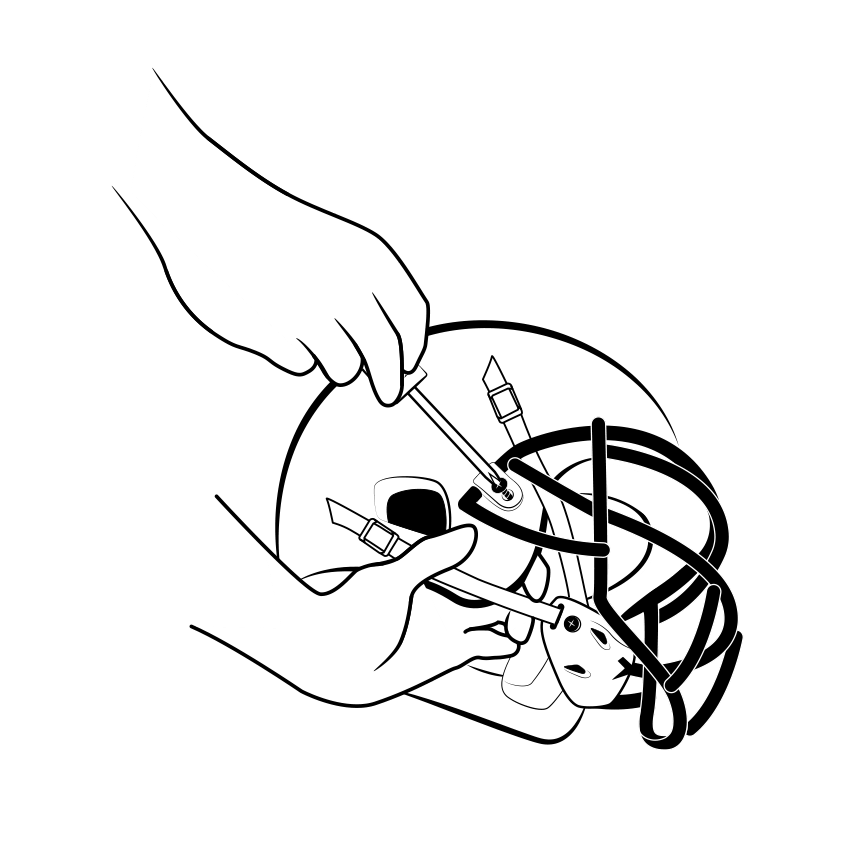
4SECURE YOUR FACEMASK
Place the screws through the clips at the top of the facemask and into the T-nut to secure. Do not overtighten. Tighten these screws first, then tighten the screws on either side of the helmet.
1REMOVE FACEMASK FROM THE HELMET
With a Phillips-head screwdriver, take out all four screws from the facemask clips and remove the facemask. Using the same screwdriver, remove the two screws and T-nuts from the pre-installed eyeshield mounting brackets.
2ATTACH THE FACEMASK CLIPS
On your new facemask, push clips into position with the X logo facing out on each clip. Adjust so each clip lines up with a T-nut, sticking out slightly on the front and side of the helmet.
3LINE-UP THE NEW FACEMASK
Place the front clips into position over the T-nuts, with a finger holding the T-nuts in place from behind. Then, align the side clips into position.
4SECURE YOUR FACEMASK
Place the screws through the clips at the top of the facemask and into the T-nut to secure. Do not overtighten. Tighten these screws first, then tighten the screws on either side of the helmet.